Managing your team
Properly managing team access ensures secure collaboration and appropriate levels of permission for different roles within your organization. ###
Accessing Team Management
To manage your team members, you first need to navigate to the correct section within your Tazapay dashboard:
- Log In: Log in to your Tazapay merchant dashboard using your credentials.
- Navigate to Settings: Locate the 'Settings' area. This will be listed in a sidebar menu, towards the bottom left of the dashboard.
- Find Team Management: Within 'Settings', look for an option labelled 'Team Management', ‘Manage Team'. Click on it.
This will take you to the main screen where you can view, invite, and manage your team's access.
2. Understanding Roles and Permissions
Tazapay uses a role-based access control (RBAC) system. Each team member you invite must be assigned a role, which determines what actions they can perform and what data they can see within the dashboard. Assigning the correct role is crucial for security.
- Owner (Admin): Has full access to the dashboard. Can manage all settings, view financial data, handle transactions, manage API keys, invite/manage other team members and all other sensitive information.
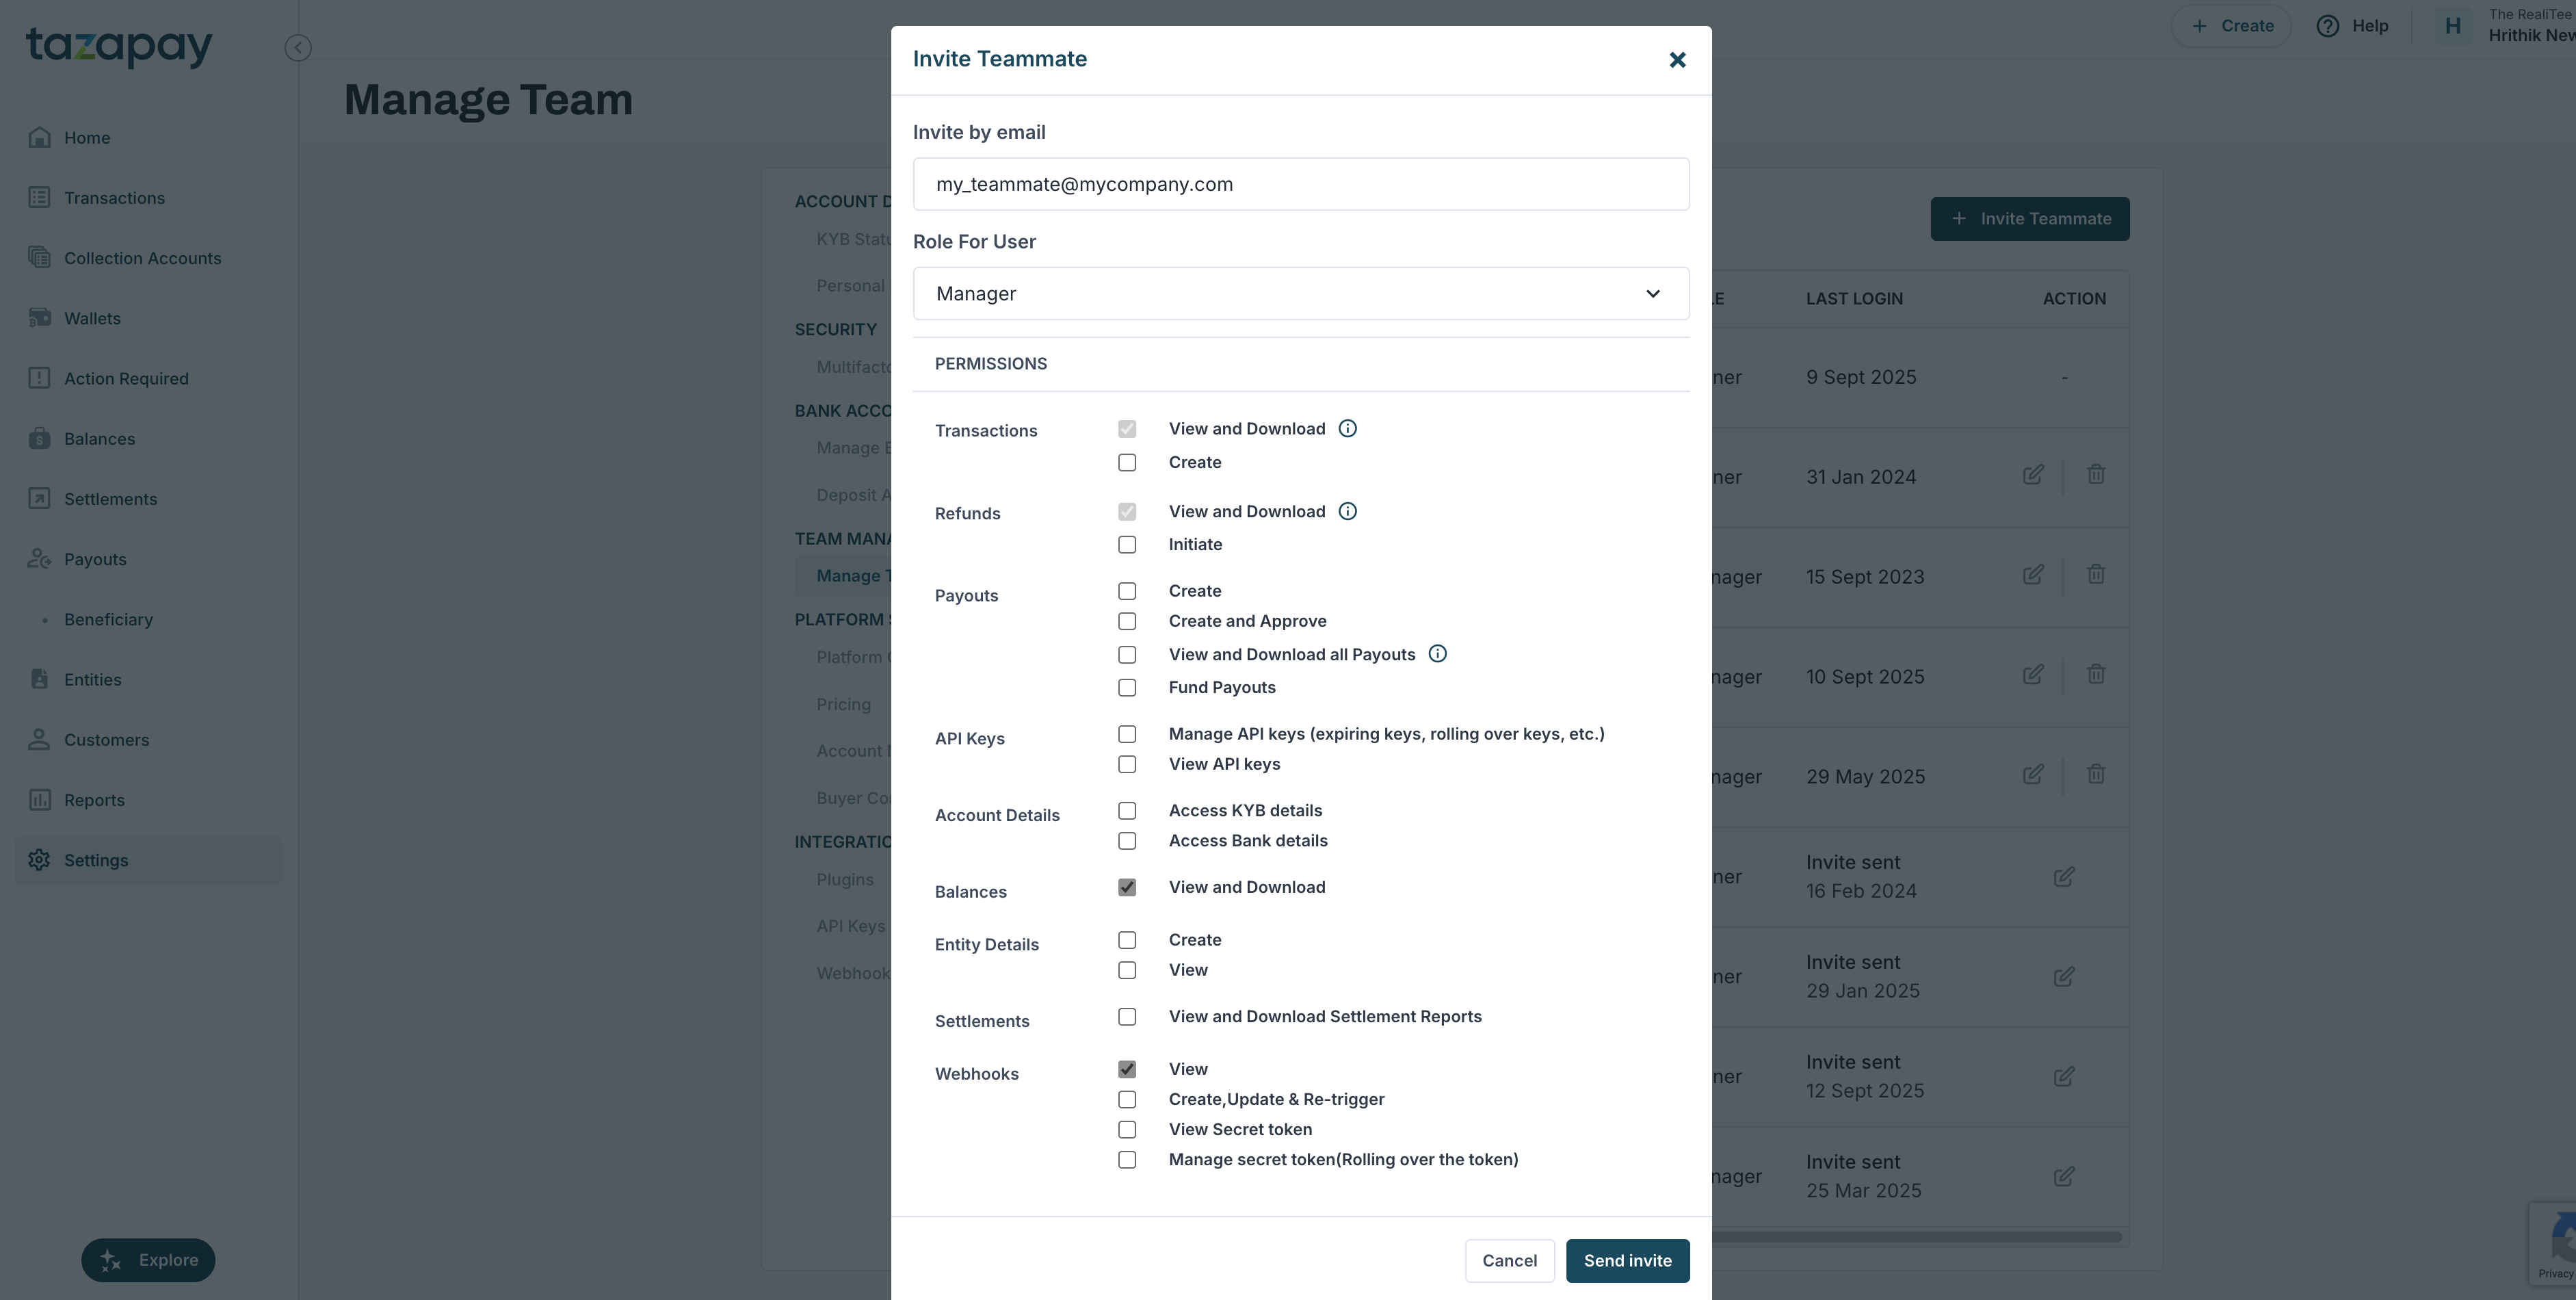
- Manager: Typically has access to view and download transactions and balance/balance transactions by default. However, this can be modified as per requirement in the ‘manage team’ section,
Important: Always review the specific permissions associated with each role directly within the Tazapay dashboard before assigning it to ensure it aligns with the team member's responsibilities.
Inviting a New Team Member
To grant a team memer access to your Tazapay account:
-
Navigate to the 'Team Management' section (as described in Step 1).
-
Click the Invite Button: Look for a button labelled 'Invite Teammate' in the upper right section.
-
Enter Email Address: Input the business email address of the team member you wish to invite.
-
Select Role: Choose the appropriate role from the dropdown list based on the access level they require (see Step 2).
- Modify the access by selecting the options available if the user you’re adding is a manager.
-
Send Invitation: Click the 'Send Invite'.
-
The invited team member will receive an email containing a link to accept the invitation and set up their access. Their role in the Team Management list will show as 'Owner' or ‘Manager’ and their ‘Last Login’ information will be captured.
If they have not accepted the invitation, the ‘Last Login’ will mention the date of the invite and the invite can be sent again if needed.
Updated 1 day ago